My father is Santa Claus. I’m not even close to kidding. Not only does he LOOK like Santa (has since I was in High School), but he’s gone to Santa School (yes, that’s a thing), works with charities year-round, and spends many of his evenings during the holidays bringing joy to families and parties to raise funds for his various charitable causes. Sometime in recent years, he’s found a few photographer friends (one even has a PhD in Photography), and he’s become a model. I can’t make this stuff up.
Since he’s Santa, he has a real, big, white beard. He also enjoys works of fantasy, such as Harry Potter and The Lord of the Rings. No surprise, then, that he likes to dress up as Dumbledore or Gandalf when the situation warrants, and occasionally get professional-grade photos taken by his insanely talented friends.
This year, for his birthday, he asked for a Gandalf hat. He said the ones on-line were really pricey. He was right, they were, but having some experience with felting, I figured I’d make one.
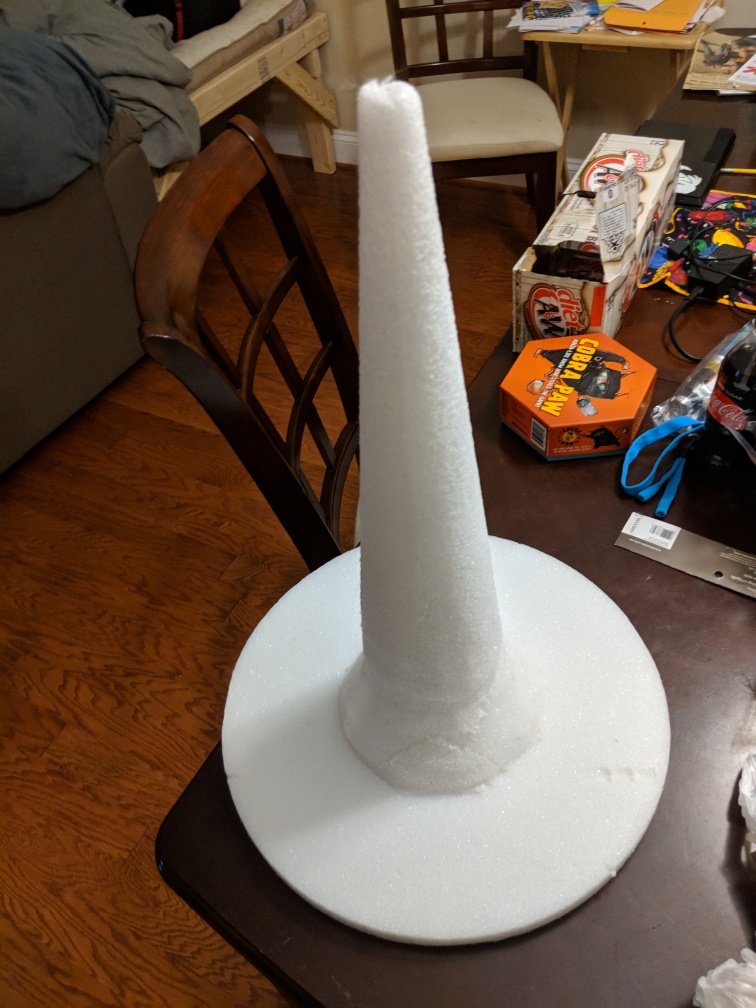
Creating a Form
A Gandalf hat is basically a floppy witch’s hat. I went to my local crafts store and got three pieces of floral foam (Disc, hemisphere, cone), and stacked them on each other to get the general shape. I hot glued the three layers together. After that, I took the blade off of my hacksaw, and used that to trim the form to the approximate shape I wanted. I thought it was a bit tall (I would have liked a steeper taper on the cone), but reasonable.
Getting a Base Layer On
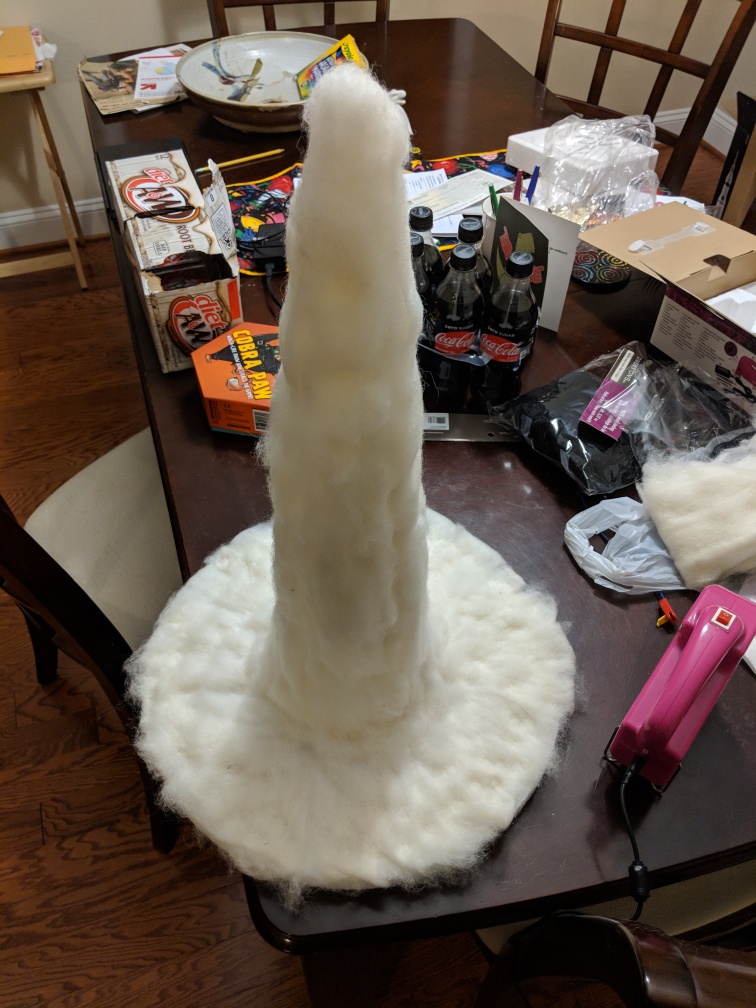
I’ve used natural color roving in this case, which I will later dye. The process is fairly straightforward: Grab a tuft of roving, and place it vertically on the form. Use a manual or automatic multi-needle felting tool to tack things into place.
Building up
Once the first layer is in place, put on a layer horizontally. Use your felting tool and basically stab the dickens out of it. For this hat, I’ve used two thicker layers of roving. For future hats, I’ll probably do three thinner layers: Horizontal, vertical, horizontal.
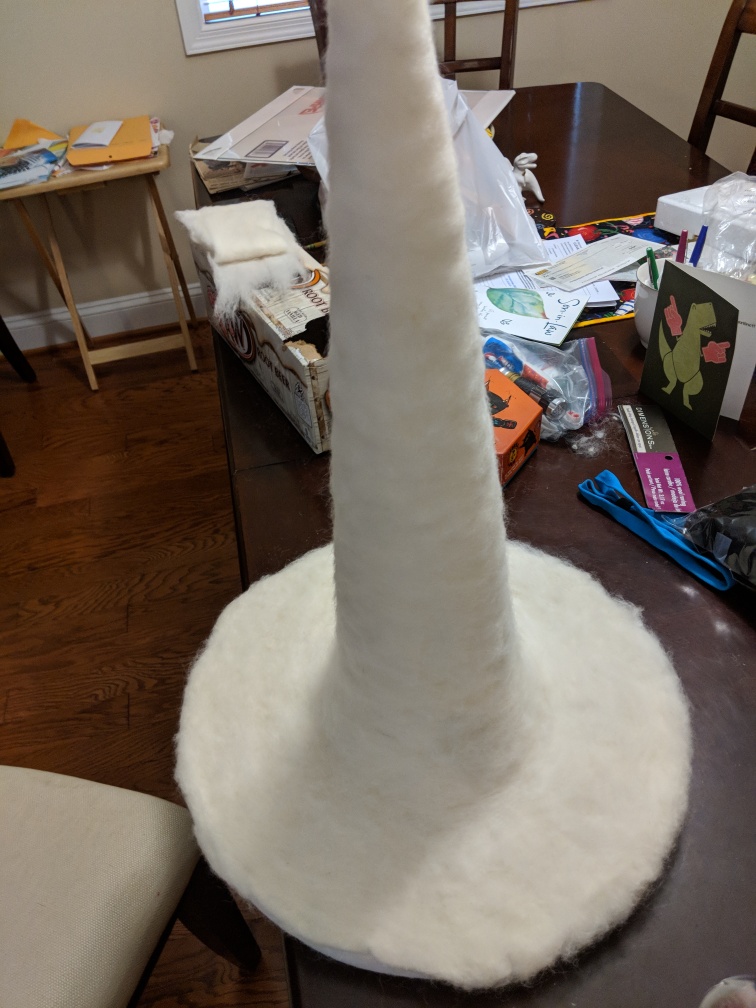
Patching
At this point, you need really good light to look for thin / weak spots. It can also help to touch all parts of the project and go by feel. If it feels thin, it is thin, and so you need to get more wool on there.
Felting
 There are lots of resources on felting, so I won’t go into the gory details. Basically it comes down to heat & agitation (soap can help too). Get a bucket of really hot water, and squoosh your project around. At this point, I was quite worried about shrinking the hat too much. I didn’t want to over-felt the project, so I left out the soap and kept a close eye while I agitated it. My dog Watson was of very little help. Later that evening he destroyed the mold to make sure the hat was a one-of-a-kind (I wish he would have asked first, though).
More Patching
The felting process will expose some holes or weak spots. At this point, the project should be fairly strong. One of the nice aspects of felting is that you can often mix felting techniques. If you have a part you need to fix, just carefully needle-felt a patch in. Make sure the edges of the patch blend in nicely with the rest of the garment.
Trimming
 Here’s the hat after it’s been felted and patched. You’ll notice that the edges of the brim are all pretty uneven. That’s completely normal. Just take a pair of scissors and smooth out the bumpy bits. Using a manual needle felting tool to eliminate hard edges from cutting. Also: At this point I found that a large portion of the top of the hat had felted itself closed and flat. I wasn’t super crazy about the length anyway, so I was able to reshape the top of the hat by cutting the excess away, and felting the new tip round.
Dying
This is the first time I’ve tried to dye a project. It’s important to either dye raw material first, or a complete project later, since you’ll never ever be able to match the original color of the piece. The process will vary depending on your dye, and there’s a bit of trial & error (or dumb luck) involved.
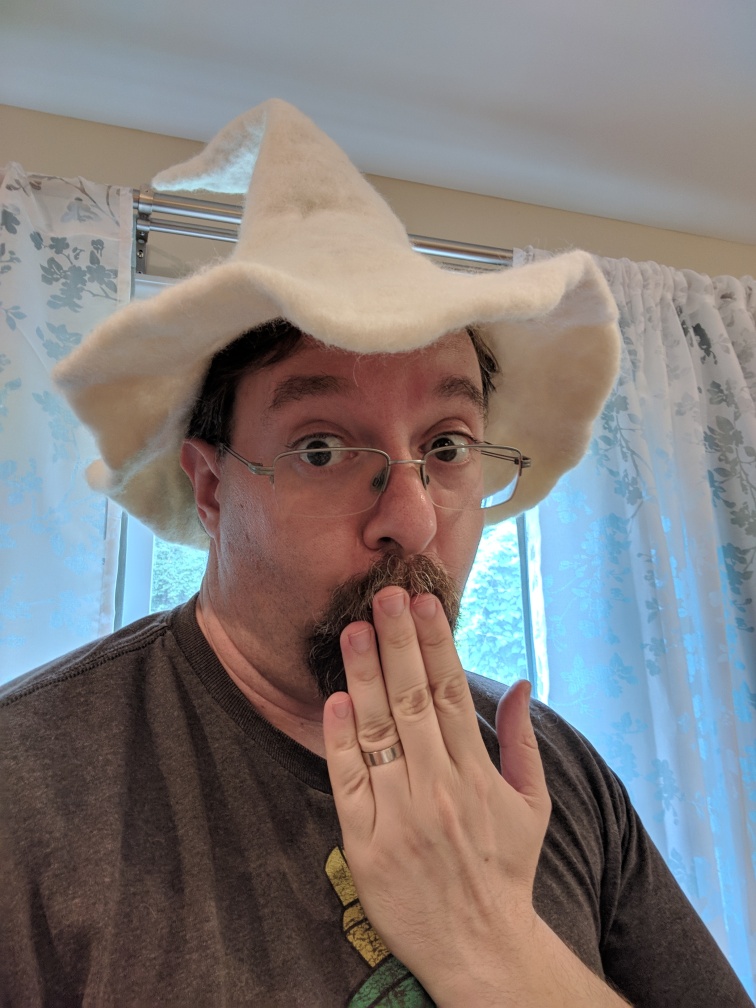
All Done!
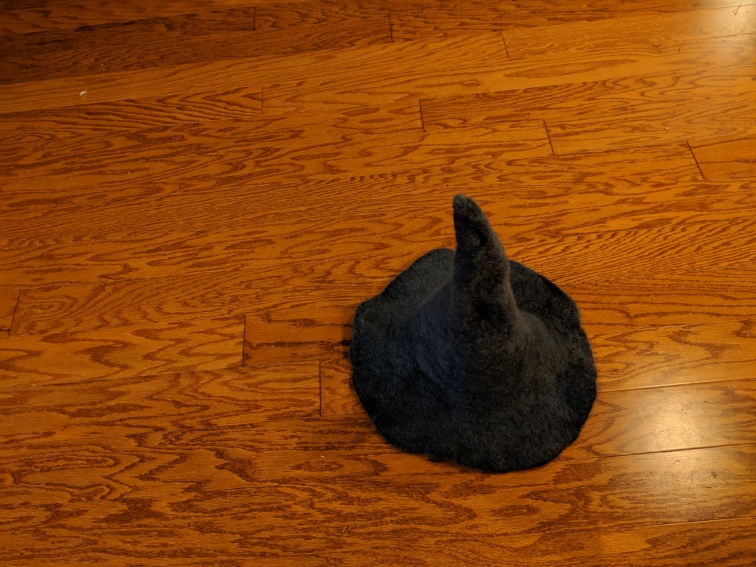
This photo is a bit dark, and the hat in real-life is a bit lighter. That said, it’s still a little darker than I was hoping. The structure and shape of the hat is really great though. It shrank just a touch more than I wanted it to, but it still serves. Considering this was almost a completely manual process, it’s very authentic. Not bad for my first foray into haberdashery!
Lessons Learned
Oversize the hat at least 2 sizes: you can always shrink it more during the felting process.
Dying it yourself is a pain. Colored roving isn’t usually that more expensive than plain roving online. Just buy the right color and save some headache.
Make sure the floral foam is VERY well secured, since the repetitive percussive nature of felting causes issues. I’ll probably put a piece of wood or long screw or something down the middle of the form to keep all the parts together next time.
